| DISCLAIMER; Brad Barber was the first to perform this "surgery" and report it to the mail list. (His article). This is how I found my NADY motorcycle intercom to be wired. It makes sense that all the units should be wired the same way. This is also true of the Radio Shack cable assembly. However, things happen, so it is up to the individual to ensure that his items are wired in a like manner, or to alter the information contained herein to fit his specific needs. I assume no liability here. | |||||||||||
| Radio Shack and NADY hardware information | |||||||||||
|
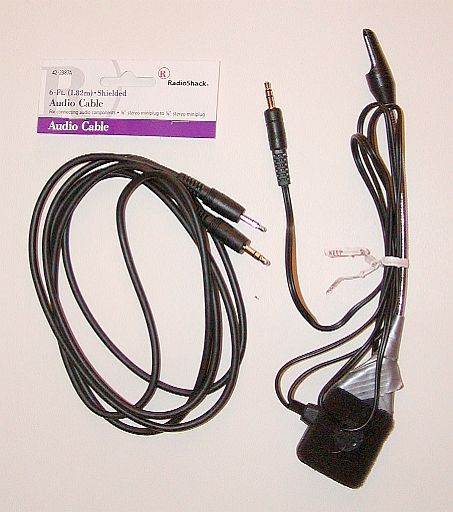
This is the Radio Shack cable and NADY imtercom earpiece/mic assembly. Radio Shack part number 42-2387A is the cable I have selected to make these repairs with. There are others available, but this one looked like the best candidate.
|
 |
||||||||||
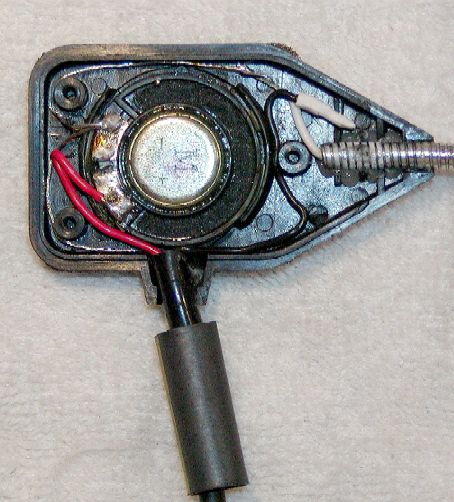
| The insides of the ear piece assembly.
You can see that I have repaired the rotating boom mike once before. that
repair did not hold.
Note that the two plugs (original on the left) are identical. The wires shown on the far right are what are contained under the jacket of the Radio Shack cable. |
 |
||||||||||
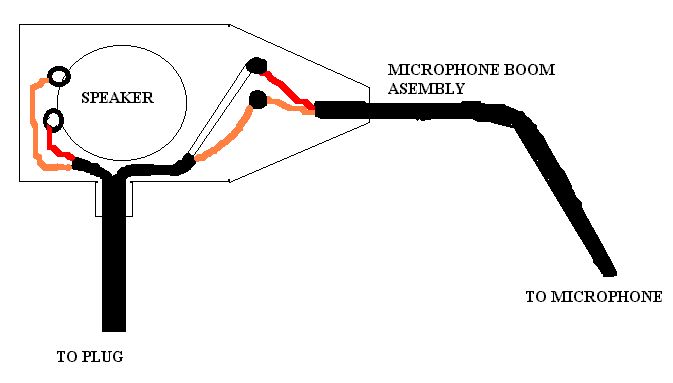
| Schematic
of the insides of the NADY earpiece. The NADY cable has two
shielded/grounded pairs of wires inside the cable. One is a red
wire with a copper shield/ground wire (this goes to the speaker) and the
other is a white wire with a copper shield/ground wire (this goes to the
boom microphone).
The copper wire is shown in tan color. |
 |
||||||||||
| The NADY plug (at the control unit) is wired as shown with both copper shield/ground wires attached to the same point. | 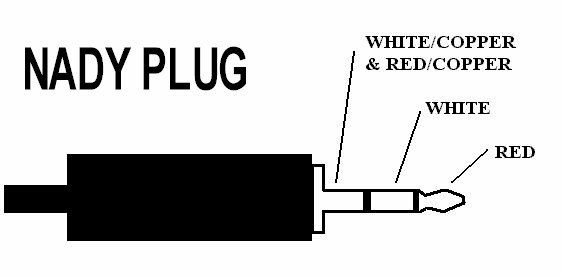 |
||||||||||
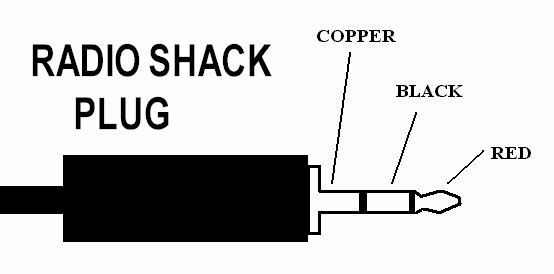
However,
the Radio Shack cable is wired up with one less copper wire and with
different colors. No big deal actually.
|
 |
||||||||||
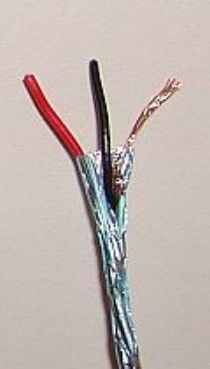
| This
is the wire of the Radio Shack cable. Note: there is only one
copper wire, and no white wire.
There is also an overall mylar shield to protect against some RFI (we hope).
|
 |
||||||||||
| How I rewired my NADY headset with a replacement Radio Shack Cable | |||||||||||
|
I took the Radio Shack cable and cut one of the two connectors off the cable. I'm making my new assemblies as long as possible. I removed about 5 inches of the jacket and trimmed the mylar shield back to the base of the jacket. We don't need the mylar shield inside the headset. |
Remove the
back of the headset by removing the three Snip the
existing wires and remove them from the assembly.
Leave the wires going to the boom mike as long as possible !! |
||||||||||
| When
inserting the Radio Shack cable assembly into the NADY unit, you route
it thru the existing "tube" that the old cable was routed
thru. Examine this tube carefully to ensure that it is secured to
the plastic housing. Mine was a bit loose, so I used a few drops
of "superglue" to secure it to the plastic. Do not
get the glue on the mating surface where the back fits.
Gorilla Glue works nicely. It even secures the metal boom in place. |
 |
||||||||||
| You
can see the interior and how I chose to route my wires. I ran
the red speaker wire and the bare shield wire to the left, and the black
microphone wire to the right.
The bare shield wire was run around the outside of the two screw posts. It detoured inward to make contact at the speaker. I just folded the wire back upon itself and soldered to the speaker. The bare shield wire then returns back to the screw post and around it, then over to the microphone bare shield wire, where the two are soldered together. The red speaker wire is just routed and connected to the speaker. The black microphone wire is laid parallel to the mike wire and soldered, then covered with heatshrink. You can see the final heatshrink for pull-out protection at the bottom |
 |
||||||||||
| Brad used a tye wrap to secure the cable from pullout. I used adhesive lined heat shrink. I can slice it open and remove it if I need to rework the cable assembly again. | 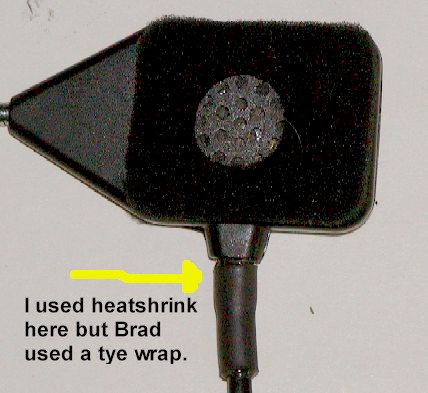 |
||||||||||
| This is the RUNNING WIRE LIST for wiring up the assembly. |
RUNNING WIRE LIST
|
||||||||||
|
FOAM FABRICATION |
to be developed | ||||||||||